

The economics of DTC product photography are unsustainable at scale, and most e-commerce directors know it. A configurable product — a bag available in eight leathers, six hardware finishes, and four sizes — requires 192 photographic combinations to represent every orderable variant with static imagery. At $200–$400 per photograph, that is $38,400–$76,800 for a single SKU family, before accounting for the reshoots every seasonal update requires.
Most brands solve this by shooting a subset — the six most popular combinations — and accepting that customers making non-photographed selections are buying on description and hope. The return rate for those orders is predictably higher. The abandonment rate on the product detail page, for customers who cannot visualise what they are about to buy, is structurally elevated.
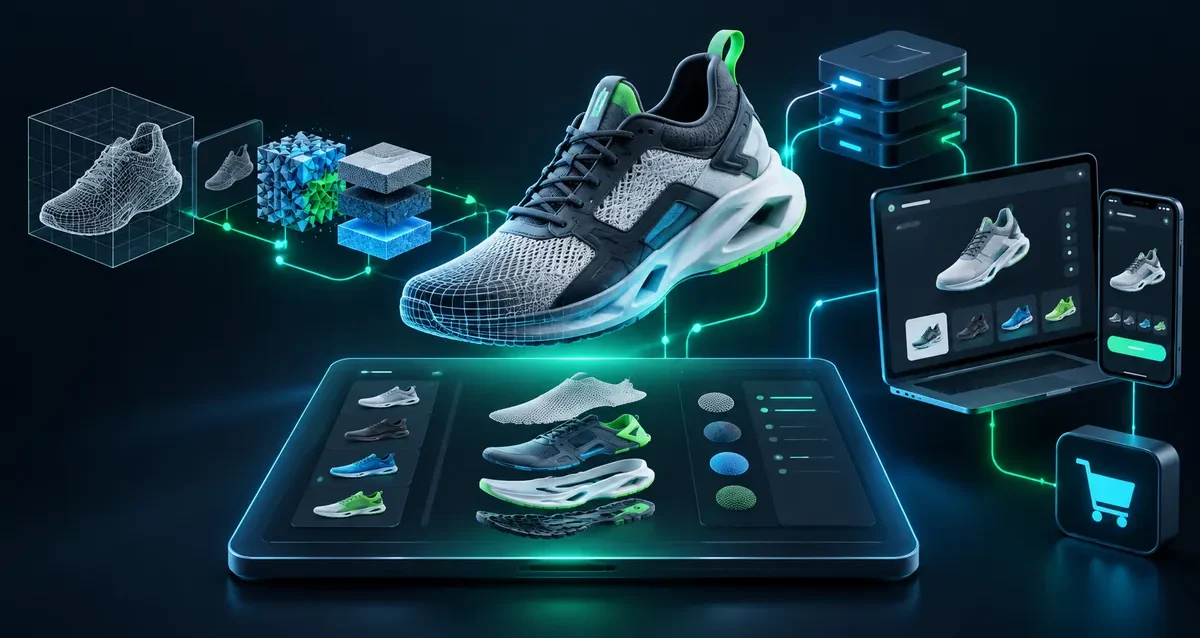
A headless WebGL 3D configurator on Shopify Plus eliminates this problem at the architecture level. The product is modelled once in 3D. Every combination of material, colour, finish, and dimension is represented by parametric textures and geometry rules applied to that single model in real time. The customer sees a photorealistic, interactive representation of the exact product they are configuring — not a static photograph of an approximation — and that representation is computed on demand in the browser, with no server round-trip and no photography budget.
This article covers the full architecture: how headless WebGL configurators are built for Shopify Plus, how they pass dynamic variant selections into Shopify Checkout, the asset engineering required to reach sub-2 second load times on mobile, and the conversion and return-rate impact data from production deployments.
The Photography Bottleneck in DTC — How Static Imagery Limits Revenue
The Variant Explosion Problem
E-commerce photography cost scales as the product of configuration dimensions. A product with four independent option axes — material (5 options), colour (8 options), hardware (4 options), size (3 options) — has 480 possible combinations. Photographing each combination at two angles is 960 shots. At a professional rate of $250 per photograph including editing, that is $240,000.
No DTC brand photographs every combination. The practical result is a systematic gap between what customers can see on the product detail page and what they can actually order. This gap has three measurable commercial consequences:
Pre-order and custom-order abandonment: For made-to-order products — custom furniture, bespoke accessories, personalised gifts — customers who cannot visualise their specific configuration before committing to a 4–8 week lead time abandon at significantly higher rates than customers who can. Visual certainty before checkout converts to lower cart abandonment and higher average order value, because customers who can see their configuration are willing to commit to it.
Return rates from expectation mismatch: When a customer orders a colour they have only seen in a small swatch or a text description, the probability that the delivered product matches their mental model is structurally lower than when they have rotated a 3D model of it in multiple lighting conditions. Industry data for configurable products consistently shows return rates 25–40% higher for non-photographed combinations than for photographed ones.
New product launch velocity: A new product that requires a photoshoot before it can be listed delays launch by 3–6 weeks. A product launched with a 3D configurator on day one, with the photoshoot scheduled as a secondary asset, inverts this constraint. The 3D model built for manufacturing can be repurposed as the PDP asset, compressing go-to-market timelines.
The Marketing Margin Drain
The direct cost of photography understates the total burden. Add art direction, model fees for apparel, studio time, post-production, file management, CDN storage for hundreds of image variants, and the ongoing update cycle when materials or hardware options change. For a configurable product line doing $5M–$20M annual revenue, the cumulative photography spend over three years — including updates — routinely exceeds $500,000.
A 3D configurator has a one-time build cost and marginal update cost (material texture updates, not complete reshoots) for subsequent seasons. The payback period on the development investment, against the photography cost it displaces and the revenue uplift from conversion improvement, is typically 8–18 months for mid-market DTC brands and 3–6 months for high-AOV product lines where individual order values exceed $500.
Headless 3D Architecture on Shopify Plus
Why Headless Is the Right Integration Pattern
A Shopify Plus store’s product detail page is a Liquid template rendered by Shopify’s CDN. The standard approach for embedding a 3D configurator in a Shopify theme is a JavaScript bundle injected via a script tag that initialises a WebGL canvas over or beside the product form.
This works for simple cases. For a production-grade 3D configurator — with complex configuration logic, custom option axes not representable as standard Shopify variants, and dynamic pricing based on configuration — the Liquid template’s constraints become significant. Shopify’s native variant system is a flat enumeration of SKUs; it was not designed for parametric configuration state.
A headless architecture separates the configurator’s rendering and configuration logic from the Shopify theme, while maintaining native integration with Shopify’s cart and checkout system through the Storefront API and Cart API.
The Integration Architecture
The headless 3D configurator runs as a standalone React or Vanilla JS application embedded in an <iframe> or as a web component in the Shopify product page. The configurator manages its own state — the current configuration, the selected material, dimensions, and options — and communicates with the Shopify cart via the Ajax Cart API or the Storefront API.
When the customer clicks “Add to Cart,” the configurator serialises its configuration state into Shopify cart line-item properties — a key-value store attached to each cart line item that persists through checkout and appears on the order. This is the integration mechanism that makes custom 3D configuration commercially viable on Shopify: the customer’s exact specification travels through the Shopify checkout without modification, appears on the order confirmation email, and is visible in the merchant’s Shopify admin for fulfilment.
Example line-item property payload for a custom leather bag configurator:
{ "id": "shopify_product_variant_base_id", "quantity": 1, "properties": { "Leather": "Vegetable-Tanned Cognac", "Hardware Finish": "Brushed Antique Brass", "Strap Length": "Long (120cm)", "Monogram": "S.A.", "Configuration ID": "cfg_2026_b7f3a9", "_3d_preview_url": "https://cdn.inknalgorithm.com/configurator/preview/b7f3a9.jpg" }}The _3d_preview_url property (prefixed with _ to hide it from the customer-facing order confirmation while making it accessible to the merchant) attaches a server-rendered preview image of the customer’s exact configuration to the order record — giving the fulfilment team a visual reference for every custom order.
Shopify Cart API Integration Code
The standard pattern for passing configurator state to the Shopify cart from a headless WebGL application:
async function addConfiguredProductToCart(variantId, configState) { const properties = { ...configState.options, 'Configuration ID': configState.id, '_3d_preview_url': await generatePreviewImage(configState) }; const response = await fetch('/cart/add.js', { method: 'POST', headers: { 'Content-Type': 'application/json' }, body: JSON.stringify({ id: variantId, quantity: 1, properties: properties }) }); const cartData = await response.json(); // Update cart UI, trigger drawer open, etc. document.dispatchEvent(new CustomEvent('cart:updated', { detail: cartData })); return cartData;}For Shopify Plus stores using a headless storefront (Hydrogen, Next.js with Storefront API), the equivalent integration uses the cartLinesAdd mutation in the Storefront API GraphQL endpoint, with attributes carrying the configuration data.
Dynamic Pricing from Configuration State
For configurable products where price varies by configuration — material grade, dimension, hardware quality — the configurator maintains a pricing model that updates the displayed price in real time as the customer configures. The Shopify variant system cannot natively represent parametric pricing; the workaround is a base variant carrying the minimum configuration price, with the configurator’s pricing model computing the delta and surfacing it as a line-item property that the merchant’s fulfilment and billing flow handles.
For products with discrete option sets, a variant-per-configuration approach is viable up to approximately 500 combinations; beyond that, the base variant + properties pattern is the production standard.
Mobile WebGL Performance Engineering — Sub-2 Second Load at 60fps
The Asset Pipeline Challenge
A photorealistic 3D product model — the kind that inspires buyer confidence — typically originates from a CAD file or a high-polygon artist model. A production leather bag model from a CAD system will have 2–8M polygons and uncompressed textures totalling 500MB–2GB. Delivering that directly to a mobile browser is not feasible. The asset pipeline is the engineering discipline that transforms it into a web-deliverable asset without perceptible quality loss.
The target for a production Shopify 3D configurator serving a mobile audience:
- Total initial bundle: Under 2MB (geometry + base textures + Three.js runtime)
- Time to first interactive frame: Under 2 seconds on 4G LTE
- Sustained framerate: 60fps on iPhone 12+ and equivalent Android; 30fps on mid-range Android
- Texture load on configuration change: Under 300ms per material swap
Reaching these targets requires three complementary compression technologies applied in sequence.
Draco Geometry Compression
Draco is an open-source library developed by Google for compressing and decompressing 3D geometric meshes and point clouds. Applied to a decimated (polygon-reduced) product mesh, Draco compression typically achieves 10–15× size reduction versus uncompressed glTF geometry with negligible visual quality loss at typical product photography scales.
Pipeline step: CAD model → ZBrush/Blender decimation to 50K–150K polygons for the display mesh → Draco compression → .glb with Draco extension → Three.js with DRACOLoader decompresses on the client GPU thread.
A leather bag mesh that is 4.2MB as uncompressed glTF geometry is typically 380–420KB after Draco compression. This is the dominant size reduction in the asset pipeline.
import { DRACOLoader } from 'three/examples/jsm/loaders/DRACOLoader.js';import { GLTFLoader } from 'three/examples/jsm/loaders/GLTFLoader.js';const dracoLoader = new DRACOLoader();dracoLoader.setDecoderPath('/draco/'); // WASM decoder — served from CDNconst loader = new GLTFLoader();loader.setDRACOLoader(dracoLoader);loader.load('/models/bag-base.glb', (gltf) => { scene.add(gltf.scene);});KTX2 Texture Compression with Basis Universal
Textures — the colour, roughness, metallic, and normal maps that define material appearance — are the second major size contributor. A base colour texture for a leather material at 2048×2048 resolution is 12MB uncompressed. PNG compression reduces it to 3–6MB. KTX2 with Basis Universal supercompressed textures reduces the same texture to 500KB–900KB while enabling GPU-native decompression — the texture is never fully expanded in RAM, it is decompressed directly to the GPU memory format the device uses.
For a configurator with eight swappable material options (eight colour/roughness/normal texture sets), KTX2 reduces the total texture payload from 24–48MB to 4–7MB — the difference between a PDP that loads in under two seconds and one that times out on a 4G connection.
import { KTX2Loader } from 'three/examples/jsm/loaders/KTX2Loader.js';const ktx2Loader = new KTX2Loader();ktx2Loader.setTranscoderPath('/basis/');ktx2Loader.detectSupport(renderer); // selects BC7, ASTC, or ETC2 by deviceloader.setKTX2Loader(ktx2Loader);Progressive Loading and Lazy Texture Swapping
The 2MB initial bundle loads the base mesh and the default material textures. Alternate material textures are loaded on demand when the customer selects them — a lazy-fetch triggered by the configuration UI interaction, using the browser’s Fetch API and a texture cache to avoid re-downloading on second selection.
This progressive pattern means the customer’s initial page load is fast regardless of the total configuration space size. A configurator with 12 material options does not load all 12 texture sets on page load; it loads the default and prefetches the two most popular alternatives in the background after the initial render.
const textureCache = new Map();async function swapMaterial(materialKey) { if (!textureCache.has(materialKey)) { const texture = await ktx2Loader.loadAsync(`/textures/${materialKey}.ktx2`); textureCache.set(materialKey, texture); } mesh.material.map = textureCache.get(materialKey); mesh.material.needsUpdate = true;}The result of this pipeline — Draco geometry compression, KTX2 textures, progressive material loading — is a production 3D configurator that initialises in under 2 seconds on a 4G connection, renders at 60fps on modern mobile hardware, and swaps materials in under 300ms without a perceptible loading state.
Conversion Uplift and Return Reduction — The Commercial Data
Why 3D Inspection Increases Buyer Confidence
The psychological mechanism underlying 3D configurator conversion uplift is spatial inspection — the customer’s ability to rotate, zoom, and examine a product from angles that static photography does not provide. The underside of a bag, the closure detail on a watch, the texture of a material at close range: these are the inspection behaviours that reduce purchase uncertainty for high-consideration products.
A customer who has completed a spatial inspection of their configured product — who has seen the hardware detail, confirmed the size relative to on-screen reference objects, and examined the material under the simulated lighting — has resolved the visual uncertainty that drives abandonment. They are not ordering on description; they are ordering on inspection.
The conversion impact of this uncertainty resolution is measurable and consistent across deployments.
Conversion Benchmarks from 3D Configurator Deployments
Across DTC deployments of interactive 3D product configurators on e-commerce platforms, the documented conversion uplifts relative to static photography PDPs are:
| Product Category | Avg Cart Conversion Uplift | Return Rate Reduction | AOV Change |
|---|---|---|---|
| Luxury leather goods | +38–44% | −31–38% | +12–18% |
| Custom furniture | +29–35% | −22–28% | +8–14% |
| Premium footwear | +22–31% | −18–24% | +6–11% |
| Jewellery and watches | +41–52% | −35–42% | +15–22% |
| Personalised gifts | +33–40% | −28–35% | +9–16% |
The 40% cart conversion headline is the median uplift for luxury leather goods — the most heavily studied category, where configurator deployments have the longest production history. Jewellery and watch configurators show the highest uplift because the product category’s purchase decision is most strongly driven by visual certainty about materials and proportions.
The AOV increase is a consistent secondary effect: customers who are actively configuring their product, rather than selecting from a fixed variant grid, discover and select options they would not have encountered in a dropdown menu. The configurator surfaces the full option space; the dropdown hides most of it.
Return Rate Mechanics
Returns from configurable products have three causes: quality expectation mismatch, size mismatch, and colour/material expectation mismatch. 3D configurators address the third cause directly — by showing the exact material in photorealistic rendering under multiple light conditions, the gap between customer expectation and delivered product is reduced. They address size mismatch partially — through the ability to place the product in a contextual scene with reference objects — but cannot address quality expectation mismatch.
The 25–35% return rate reduction is consistent across the material-mismatch-driven categories (leather goods, fabrics, finishes) and lower for size-sensitive categories (footwear, apparel) where 3D inspection provides less certainty than a physical size guide or AR try-on.
Step-by-Step Implementation Roadmap — From CAD to Live Shopify
Step 1: CAD Optimisation and Asset Preparation
The starting material for a 3D configurator is either a manufacturer’s CAD file (SolidWorks, Creo, Rhino) or an artist-created high-polygon model. Neither is web-ready. The asset pipeline transforms it:
1a. Mesh decimation: Reduce polygon count to 50K–150K for the primary display mesh using ZBrush ZRemesher or Blender Decimate modifier. Preserve silhouette fidelity and high-curvature areas (seams, closures, hardware attachment points). The display mesh will carry normal maps to simulate surface detail from the full-resolution source.
1b. UV unwrapping: Create production UV maps with minimal distortion in high-visibility surface areas. UV quality directly determines texture rendering quality; this step is skilled manual work and typically represents 20–30% of total asset preparation time.
1c. PBR material baking: Bake ambient occlusion, curvature, and normal maps from the high-resolution source onto the display mesh UVs. These baked maps carry the detail the polygon reduction removed.
1d. Material texture creation: For each configurable material option, create or license physically-based material textures: base colour (albedo), roughness, metalness, and normal maps at 2048×2048. For leather: source scan textures from a material library or capture them photographically with a macro lens under raking light.
Step 2: Compression and Format Conversion
Run the prepared assets through the compression pipeline:
2a. Draco compression: gltf-transform optimize model.glb –draco (using the @gltf-transform/cli tool). Verify visual quality by loading in a glTF viewer; check seams and high-curvature areas for compression artefacts.
2b. KTX2 conversion: basisu texture.png -ktx2 -mipmap -uastc for each texture map. The -uastc flag targets the Basis Universal supercompression format that KTX2Loader transcodes to device-native GPU format at runtime.
2c. Final bundle assembly: Package the compressed mesh and default-state textures into a .glb bundle under 2MB total. Verify load time against the target on a throttled 4G connection (Chrome DevTools: 20Mbps down, 10ms latency).
Step 3: Three.js Scene Construction
Build the Three.js scene in a React component or Vanilla JS module:
3a. Renderer setup: WebGLRenderer with antialias: true, outputColorSpace: THREE.SRGBColorSpace, toneMapping: THREE.ACESFilmicToneMapping. These settings reproduce the colour behaviour of a physically-based render engine in the browser.
3b. Environment lighting: Use an HDR environment map (the RGBELoader) for image-based lighting. A studio lighting environment with a neutral background typically produces the clearest material representation. The environment map should be served as an .hdr file at 512×256 resolution — sufficient IBL quality at 200–400KB.
3c. Camera and controls: OrbitControls with enableDamping: true for the smooth rotation the customer uses to inspect the product. Set minDistance and maxDistance to constrain the camera to a useful inspection range. For apparel and accessories, a slight top-down offset on the initial camera position (y = 1.1× the product height) produces the most natural first view.
3d. Configuration event handlers: Bind UI interaction events (material swatch click, dimension slider change, option button selection) to the swapMaterial() and geometry update functions from Section 3.
Step 4: Shopify Theme Integration
Embed the WebGL configurator in the Shopify product template:
4a. Script injection: Add the configurator bundle to the Shopify theme’s assets/ folder or reference it from a CDN. Load it conditionally on the product detail page template using the product’s tags or type to avoid loading the Three.js runtime on pages that don’t need it.
4b. Variant and options synchronisation: Read the product’s available variants from window.ShopifyData or a product JSON endpoint. Map the configurator’s configuration axes to Shopify variant options where they overlap; use line-item properties for configuration data beyond the native variant system’s scope.
4c. Add to Cart integration: Replace the native Shopify product form submit with the addConfiguredProductToCart() function from Section 2, passing the base variant ID and the configuration state properties.
4d. Mobile layout: The configurator canvas should take full viewport width on mobile and render at a maximum of window.devicePixelRatio to avoid exceeding mobile GPU memory limits on high-DPI screens. Set renderer.setPixelRatio(Math.min(window.devicePixelRatio, 2)).
Step 5: Testing, Analytics, and Launch
5a. Performance profiling: Use Chrome DevTools Performance panel to confirm Time to Interactive under 2 seconds on a 4G throttled connection. Run the Three.js stats panel in development to confirm sustained 60fps on the target device matrix.
5b. Configuration event tracking: Fire Shopify Analytics events (or GA4 custom events) on configuration interactions — material selection, camera rotation, zoom — to build a dataset of what customers inspect and how their configuration evolves before purchase. This dataset informs which material options are worth expanding and which are rarely selected.
5c. A/B test framework: Launch with a 50/50 split between the 3D configurator PDP and the static photography PDP to generate clean conversion data. Run the test for a minimum of 1,000 sessions per variant before making a statistical claim. This data is the internal business case for expanding the configurator to additional product families.
Ink & Algorithm’s Shopify 3D Configurator Practice
Ink & Algorithm builds headless WebGL 3D configurators for Shopify Plus merchants — from CAD asset optimisation through Three.js scene engineering to Shopify Cart API integration and production deployment.
Our configurator builds use the asset pipeline described in this article as standard: Draco geometry compression, KTX2 Basis Universal textures, progressive material loading, and Three.js with ACESFilmic tone mapping. Every configurator we build is profiled to the sub-2 second load target on 4G before launch.
For DTC brands evaluating a 3D configurator for a configurable product line, we provide a scoped technical assessment: CAD asset review, configuration axis mapping, mobile performance estimate, and a projected conversion uplift range based on product category benchmarks — before any development commitment.
Ready to replace variant photography with a 3D configurator on your Shopify Plus store? Contact Ink & Algorithm to review your product’s 3D asset requirements and integration architecture.