
TL;DR: Interior designers use real-time 3D visualization to walk clients through proposed designs, swap materials on the fly, and show lighting throughout the day—all before any furniture is moved or walls are painted. Designers using real-time visualization report 50% faster client approvals, 40% fewer revision cycles, and higher client satisfaction. Here’s how the technology works in 2026.
Interior design has always had a visualization problem. A designer creates a beautiful mood board, shows fabric swatches and paint samples, and describes how the space will feel. The client nods, says “I think I can see it,” and then is disappointed when the result doesn’t match their imagination.
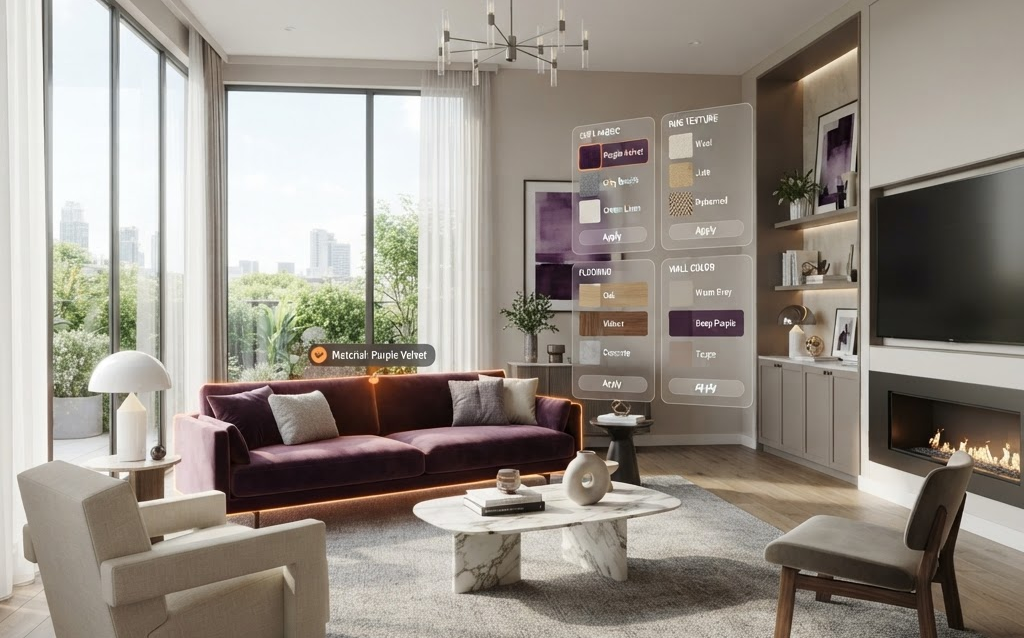
Real-time 3D visualization eliminates this gap. Instead of describing a design, the designer shows it—a fully rendered 3D space that the client can walk through, with materials they can change in real time and lighting that shifts from morning to evening. What used to require imagination now requires only a screen.
How Real-Time Interior Design Visualization Works
Creating the Digital Room
The designer starts with a 3D model of the client’s space—either from architectural drawings, a 3D scan, or a simple room model. The room’s dimensions, windows, doors, and structural elements are accurate to the real space.
Applying Design Elements
The designer places furniture, applies wall colors, installs flooring, and adds decor—all in the 3D model. Using tools like Twinmotion, Enscape, or Unreal Engine 5, every element renders in real time with photorealistic materials and accurate lighting.
Client Walkthrough
The client views the 3D space on a screen, in VR, or through a web browser. They walk through the room, examine details, and experience the design at human scale. The designer can change materials during the walkthrough—swap the wall color, change the flooring, replace the sofa—showing alternatives instantly.
Why Interior Designers Need Real-Time Visualization
Faster Client Approvals
Clients approve designs they can see and understand. A 3D walkthrough leaves no ambiguity—the client sees exactly what they’re getting. Designers using real-time visualization report 50% faster approval cycles because clients make decisions in the session instead of going home to “think about it.”
Fewer Revisions
Most revisions happen because the client didn’t fully understand the design from mood boards and swatches. With a 3D walkthrough, the client sees the complete design before approval—reducing revision cycles by 40%.
Upselling Premium Options
When a client can see how a $200/sqft hardwood floor looks compared to a $8/sqft laminate, they’re more likely to upgrade. Designers using real-time visualization report 20–30% higher project values because clients choose premium options they can see and experience.
Competitive Differentiation
In a market where most designers still present 2D mood boards, offering a real-time 3D walkthrough is a competitive advantage. Clients choose the designer who shows them the result over the one who describes it.
Tools for Interior Design Visualization in 2026
| Tool | Best For | Cost | Learning Curve |
|---|---|---|---|
| Enscape | SketchUp/Revit integration, quick walkthroughs | $300–$500/yr/seat | Low |
| Twinmotion | Marketing renders + interactive walkthroughs | $500/yr | Medium |
| Unreal Engine 5 | Premium quality, VR, web streaming | Free (royalty >$1M) | Steep |
| D5 Render | Cost-effective alternative | $360–$600/yr | Medium |
| Homestyler | Simple room design, client-friendly | Free–$30/month | Low |
| Planner 3D | Quick concept visualization | Free–$25/month | Low |
Best Practices for Client Presentations
Prepare Multiple Material Options
Before the client meeting, prepare 2–3 material palettes. During the walkthrough, switch between them instantly. This lets the client compare options in real time rather than imagining them from swatches.
Show Day and Night Lighting
Use the real-time engine’s time-of-day feature to show the space at different hours. Morning light through east windows, afternoon warmth, and evening ambiance with artificial lighting. Clients love seeing how the space transforms throughout the day.
Start Wide, Then Zoom In
Begin with the full room view to establish the overall design. Then zoom into details—the texture of the upholstery, the finish of the hardware, the grain of the wood. This progression from macro to micro builds understanding and confidence.
Let the Client Navigate
If the client is comfortable, let them control the walkthrough. Hand them the mouse or put them in VR. Clients who explore the space themselves engage more deeply than those who watch passively.
Cost of Interior Design Visualization
| Service | Cost | Timeline |
|---|---|---|
| Single room visualization | $500–$3,000 | 3–7 days |
| Full home visualization | $3,000–$15,000 | 1–3 weeks |
| Interactive walkthrough (web-based) | $5,000–$25,000 | 2–6 weeks |
| VR presentation for client | $10,000–$40,000 | 3–8 weeks |
FAQ: Interior Design Visualization
Do I need 3D modeling skills to use real-time visualization?
Tools like Enscape and Homestyler are designed for interior designers, not 3D artists. Enscape runs inside SketchUp, which many designers already use. Homestyler has a drag-and-drop interface. For premium quality, Unreal Engine requires more training but delivers film-grade results.
Can clients view the 3D design on their own device?
Yes. Using web-based delivery (Enscape web export, Unreal Pixel Streaming, or Twinmotion cloud), clients can open a link in their browser and walk through the design on any device—phone, tablet, or laptop. No software installation required.
How much does interior design visualization cost?
A single room visualization costs $500–$3,000. A full home costs $3,000–$15,000. An interactive web-based walkthrough costs $5,000–$25,000. A VR presentation for a high-end client costs $10,000–$40,000. The cost depends on the quality level and interactivity required.
Can I change materials during a live client presentation?
Yes—this is the key advantage of real-time visualization. Swap wall colors, flooring, furniture, and lighting instantly during the presentation. The client says “can we try darker wood?” and you click—the floor changes. This real-time iteration is impossible with traditional rendering.
What’s the difference between real-time visualization and traditional 3D rendering?
Traditional 3D rendering produces a fixed image—you can’t change it after it’s rendered. Real-time visualization renders at 60fps, so you can walk through, change materials, adjust lighting, and explore interactively. A change that takes 8 hours in traditional rendering takes 1 second in real-time.
Getting Started
- Start with Enscape if you use SketchUp or Revit—lowest learning curve, instant results
- Build one room visualization and test it with your next client presentation
- Measure approval speed — compare client decision time with vs without 3D
- Upgrade to Twinmotion or Unreal for higher quality as your needs grow
- Offer web-based walkthroughs — send clients a link they can explore on their own
Ready to upgrade your interior design presentations to real-time 3D? Contact Ink & Algorithm to discuss your project—we’ll help you create interactive visualizations that win clients and speed approvals.